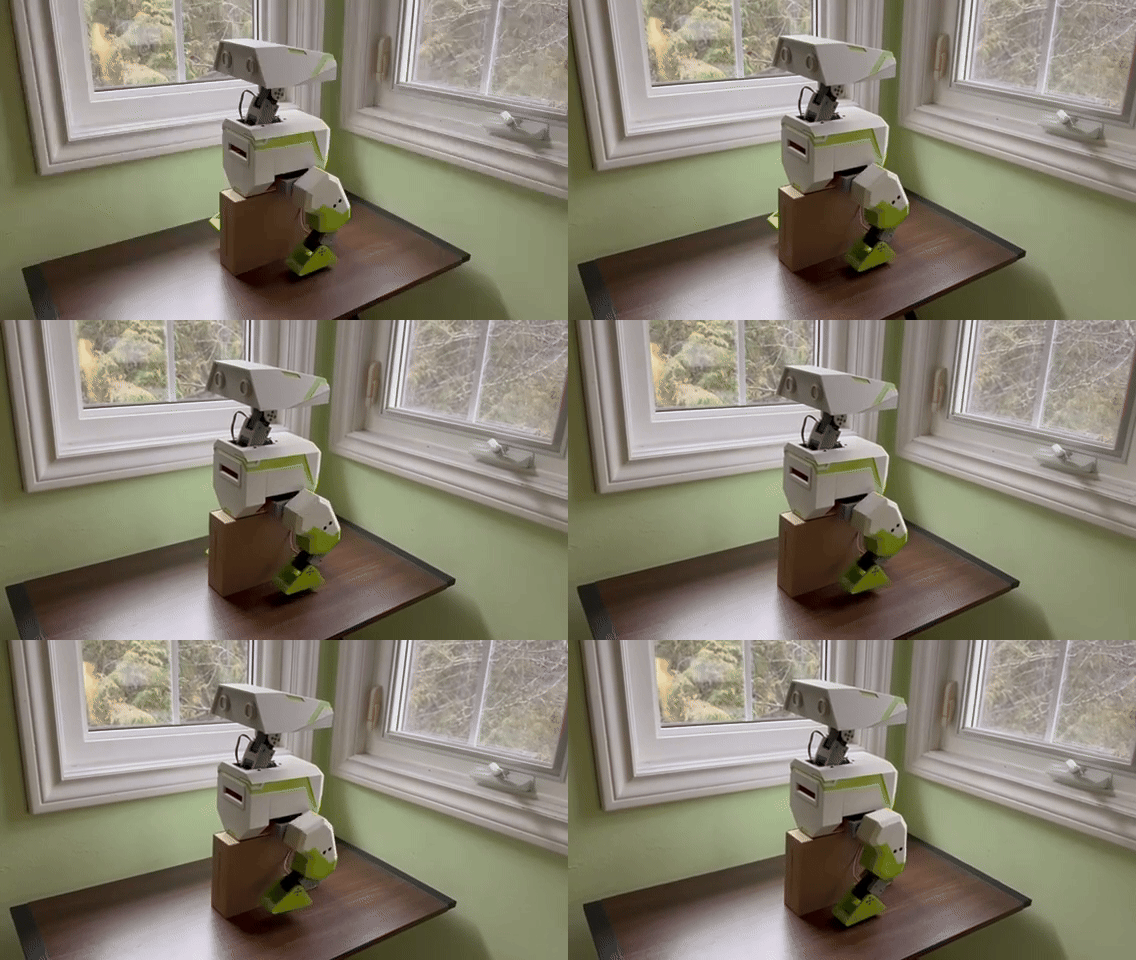
BDX Droid
This article describes my process for creating a bipedal walking robot from scratch.
Links:
https://github.com/rubieluo/bipedal_cad
https://github.com/rubieluo/bipedal_reference_motion
https://github.com/rubieluo/bipedal_sw
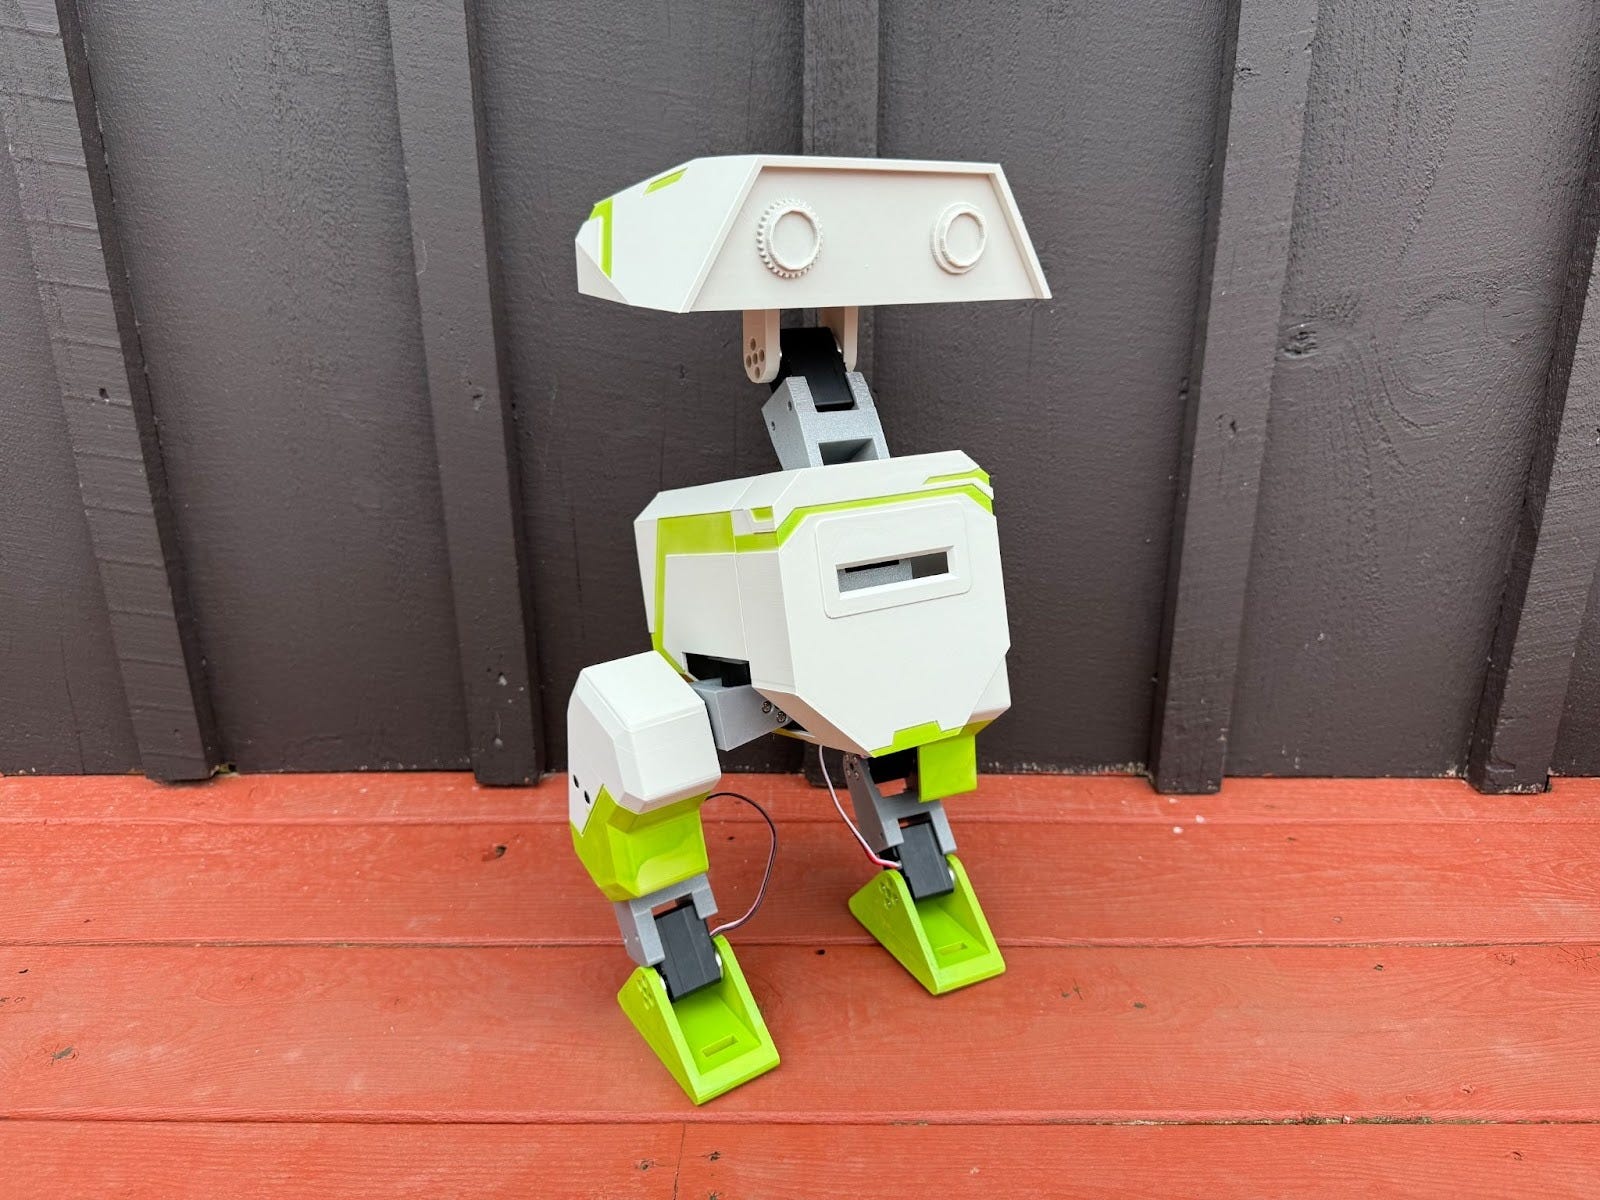
Inspiration
This project is heavily (and very visibly) inspired by Disney’s BDX droid. They’ve done the deed of writing a detailed paper about it appropriately titled Design and Control of a Bipedal Robotic Character. Read about it here.
Goals
My overarching goals this term were to become a better engineer and play with robots. My goals for this specific project were as follows:
Learn/understand RL as more than just a black box
Learn/understand standard controls
Simulate robot and make it walk, possibly more than just walking
Preamble
Component Selection
Using ST3215 servos from Waveshare
Chosen because they have precise control (built in position control), high torque (30 kgcm), can daisy chain together (great for application with many motors like the bipedal, less wires). Fair price. Would prefer to use dynamixels but out of budget
Print everything in PLA as a default. Print feet in TPU for shock absorption
For TPU I debated between using 95A (most common TPU shore hardness) or 85A (softer, grippier, harder to print with). I ended up going with 95A because it was easily available, though I believe 85A would be a better shock absorber.
Decision making
Disney’s robot has at least 4 degrees of freedom (DOFs) for the neck/head. This is what allows it to be expressive and friendly. I am deciding that I will only have 2 DOFs for the neck. This is because excessive DOFs add complexity, and according to the previously specified goals, is unnecessary. No goal was to make it show emotion/be entertaining. Would love to do that sometime but not for this project
Legs will have 5 DOFs, matching those seen on Disney’s droid
Process
Design
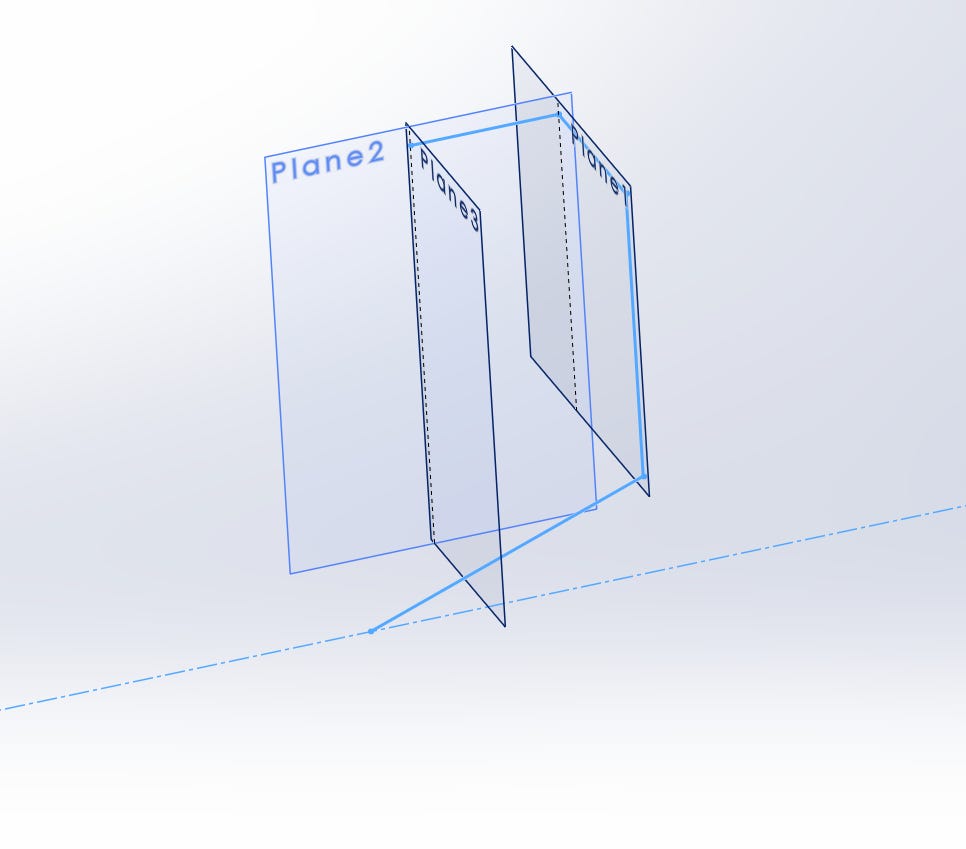
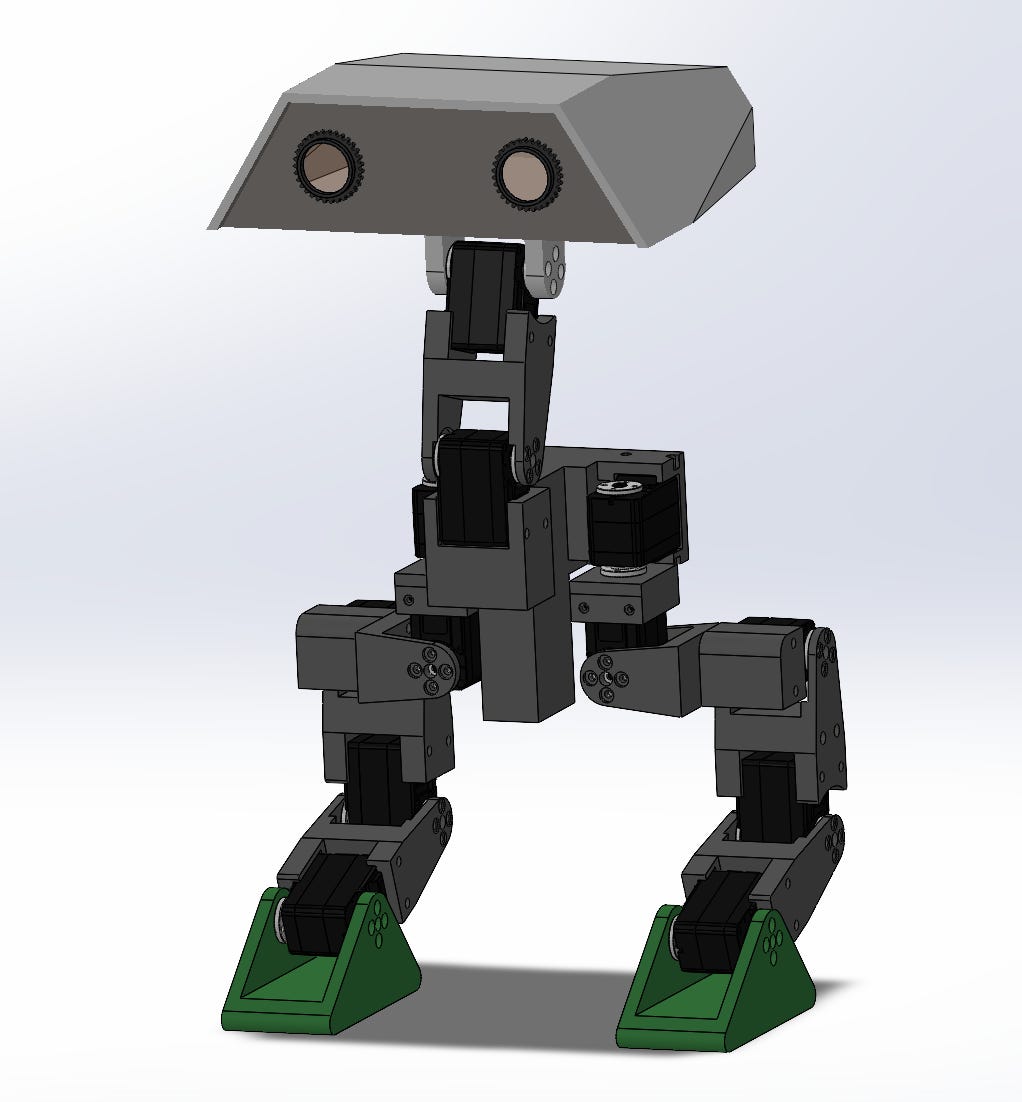
The design was proportionally sized down from the original BDX droid according to the size of the my motors. I made a sketch of where the joints and motors would be placed for the leg. The rest of the leg was effectively modelled based on the sketch, and changing the sketch changes the limbs. (master modeling)
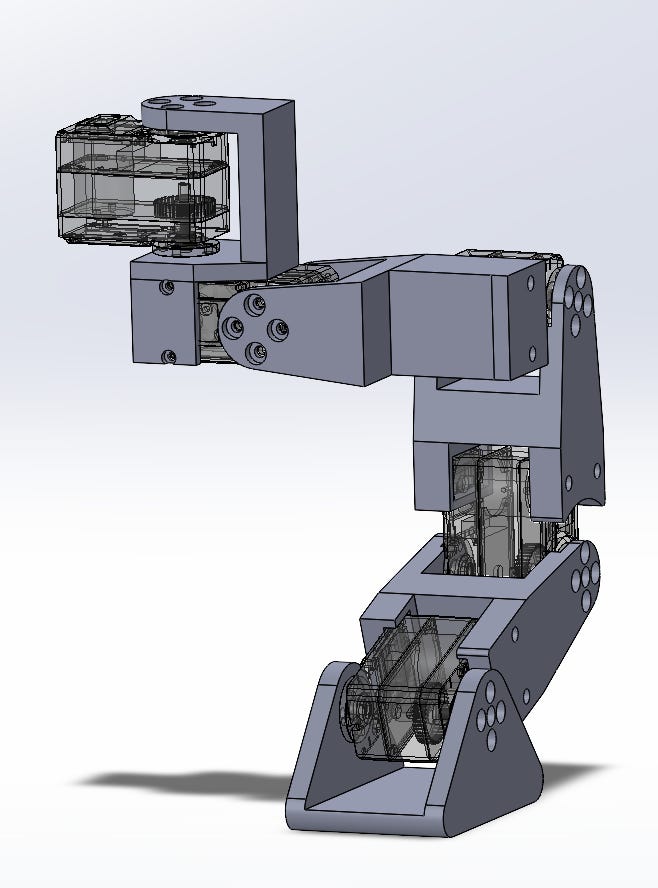
After one leg, the rest is easy. The leg was mirrored and a middle piece was added to connect the two. The CAD without the casing looks like:
And with the case:
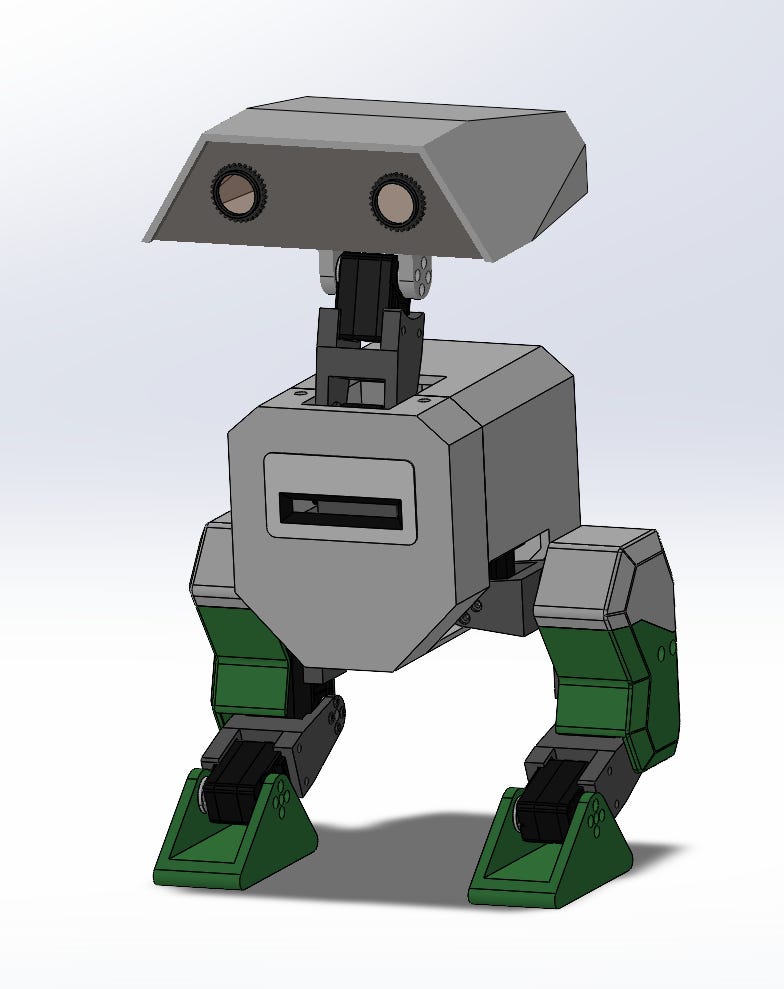
The full CAD can be found here.
Wiring
Using 14.8V lipo battery since it has a bms built in so no need to find/integrate externally.
The battery goes to a rocker switch (easily cut power if something goes wrong) to two buck converters. A 5V output for the raspberry pi and 12V output for the servo bus board.
I needed to buy micro usb with V+ and V- exposed to power the raspberry pi. Servo driver board has screw terminals to use.
Creating URDF
The URDF is used to simulate the walk. Different simulation platforms use different robot descriptions, for example, Placo is integrated with URDF files, while MuJoCo uses XML files. We will need both. First the URDF will be generated directly from solidworks, then the XML will be generated based on the URDF. For the URDF:
Create each joint/link as one part. To do this, choose the link and invert selection, hide everything that isnt the link. Then file->save as and save it as a sldprt.
Create new assembly using the links
Download https://wiki.ros.org/sw_urdf_exporter downloaded 2021 version and worked fine with sw 2024
In assembly, Tools -> Export URDF
Select base, add number of joints in joint_type, add number connected to base and go through each limb adding each linkage as needed
For each limb, select the part, change joint type to revolute, add 1 if another linkage is connected down the tree. Select the new Empty_Link in tree and continue
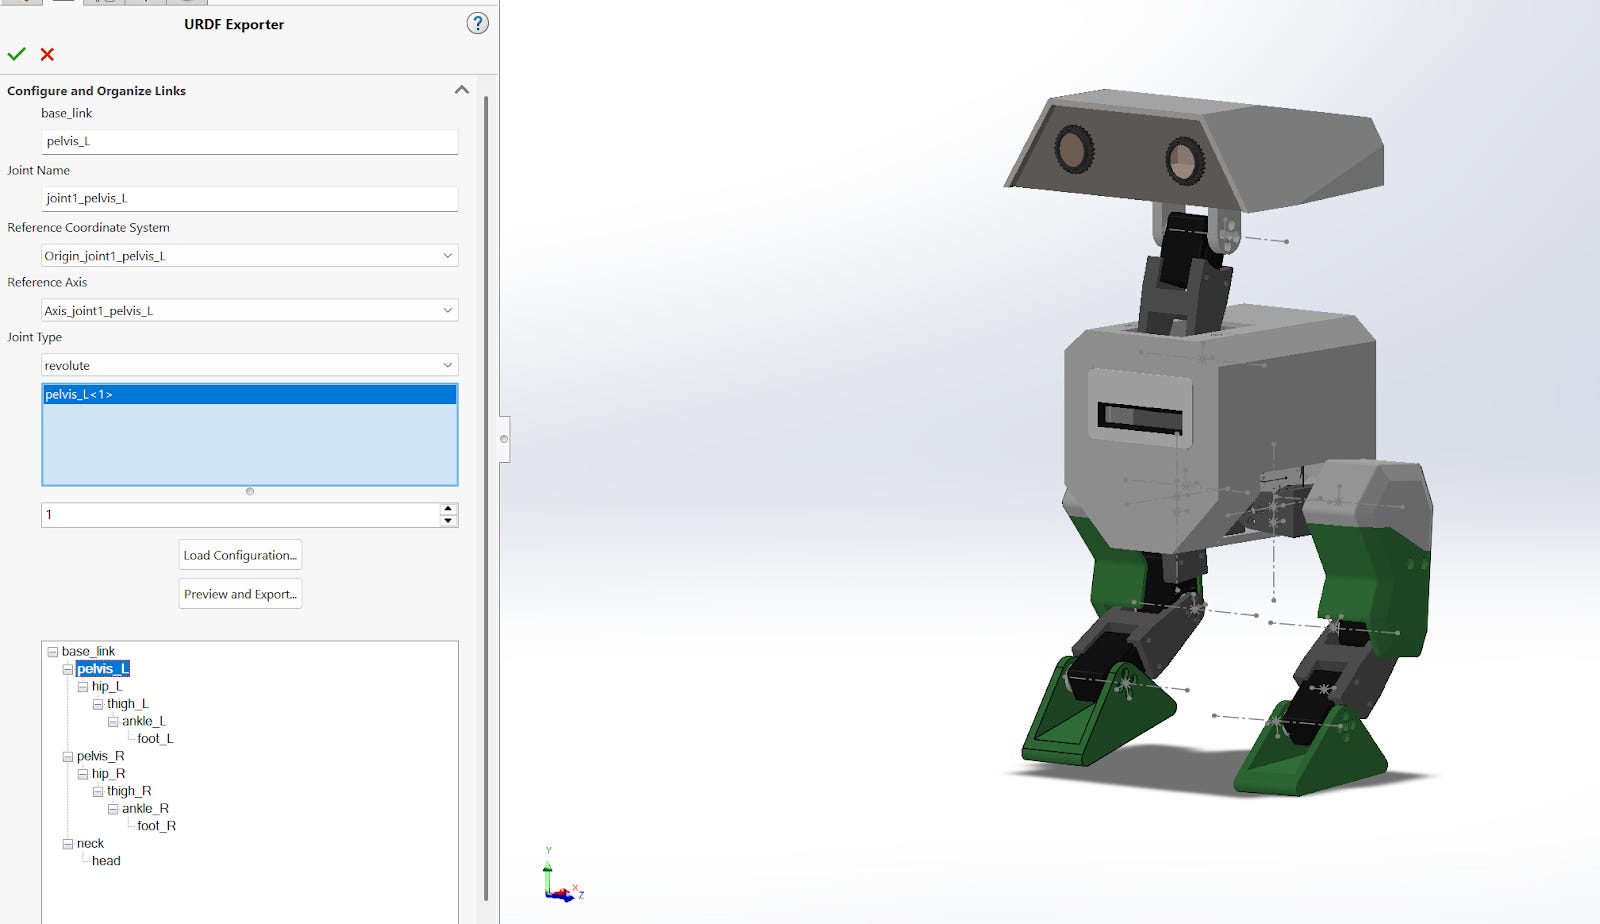
Preview and export, will see it generate axes and coordinate systems for each joint. This is based on concentric mating, be sure mates are all correct
In the popup, change all joint types back to revolute (default will be continuous, which is not desired here)
Click next and click export URDF and meshes. Could change the colours of parts and add joint limits here
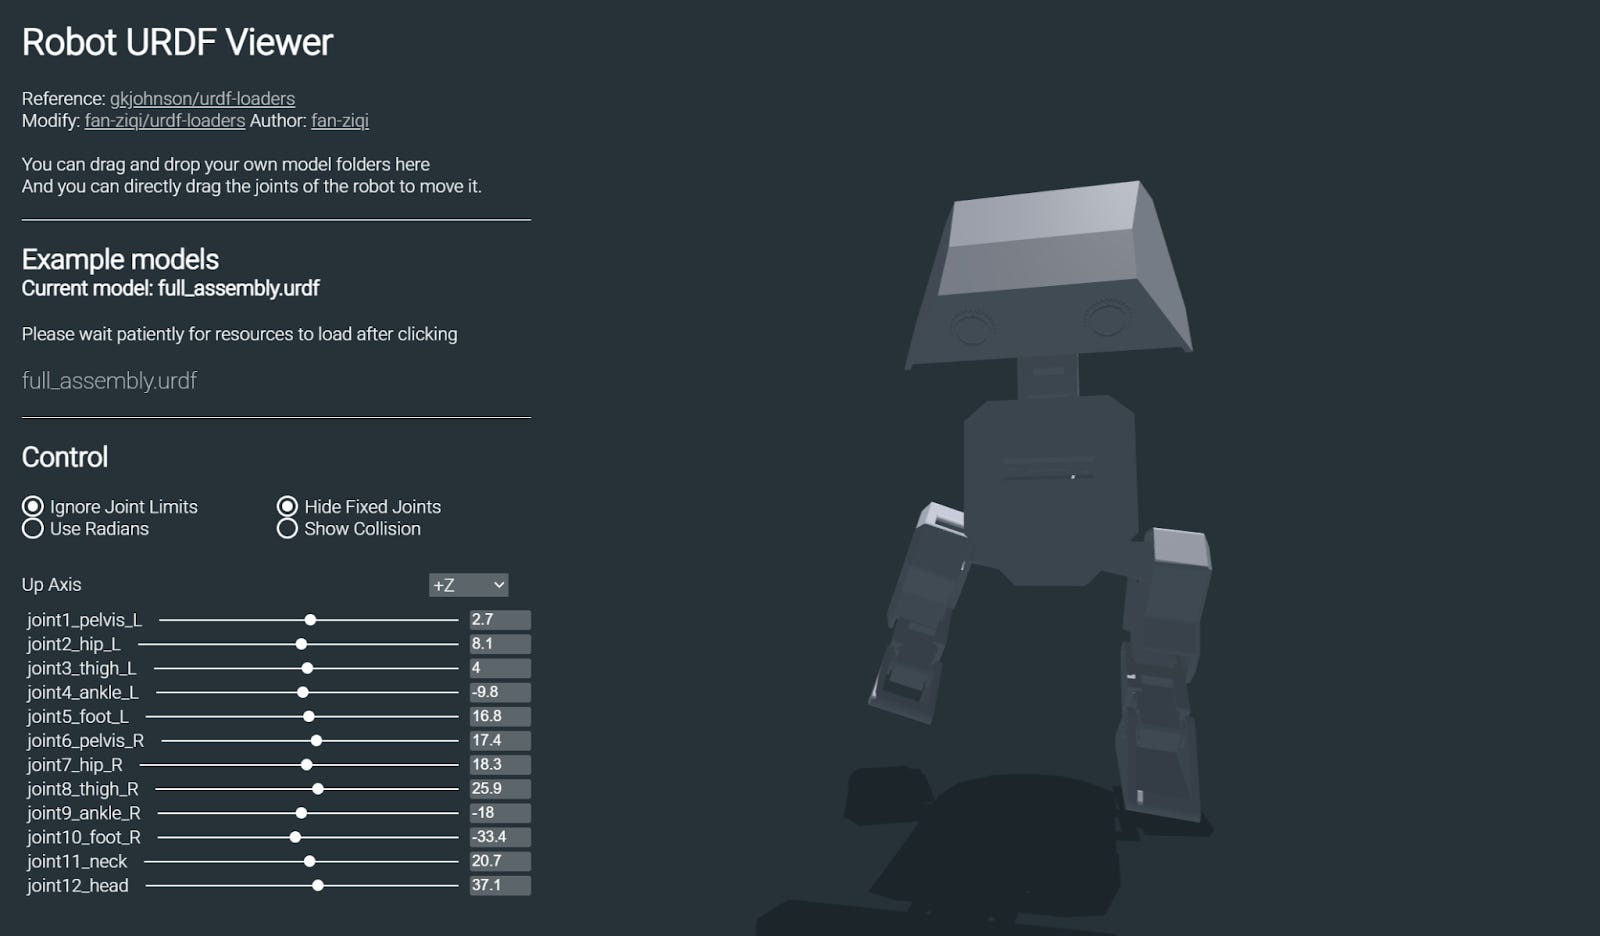
Can check URDF by drag and dropping into http://urdf.robotsfan.com/
Required URDF Modifications
Rename base_link to trunk, make sure to replace in parent tags as well (ctrl f and replace but dont replace the file names)
Same with foot_L -> left foot and foot_R -> right_foot
Add at top
<mujoco>
    <compiler balanceinertia=”true” discardvisual=”false” fusestatic=”true”/>
</mujoco>
Simulation (MuJoCo)
MuJoCo uses xml files to describe the robot instead of URDF. Thus it is necessary to convert the urdf to xml. I did this by following the steps detailed here: https://docs.kscale.dev/docs/urdf2mjcf
The file paths need to be modified to reflect the correct filesystem structure. I moved the xml to same tree level as meshes folder, and changed the paths in the xml to be relative (delete package://… etc)
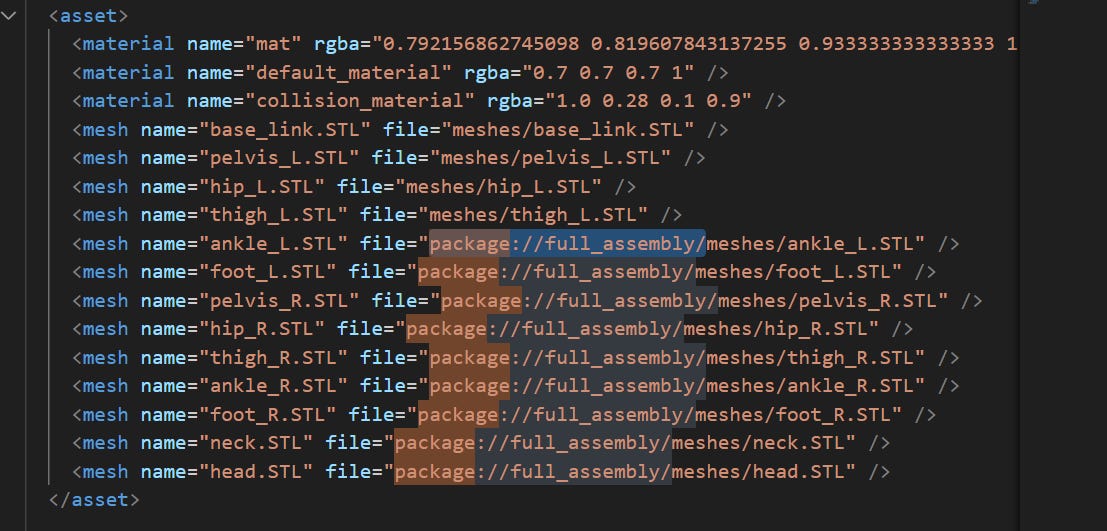
Required xml modifications
Give all joints range (default “0 0” is bad)
Add joint ranges
Change <motor to be <position
Add to motor class
<default class=”motor”>
<joint frictionloss=”0.1” armature=”0.005” range=”-1.57 1.57” damping=”0.5” />
<position kp=”3” kv=”4” ctrlrange=”-1 1” forcerange=”-50 50” />
</default>
To look at the robot in the physics engine, run a simple stand test
import mujoco
import mujoco.viewer

# Replace with your exported URDF path
model = mujoco.MjModel.from_xml_path(”full_assembly_v2/full_assembly_v2.mujoco.xml”)

data = mujoco.MjData(model)
with mujoco.viewer.launch_passive(model, data) as viewer:
    while viewer.is_running():
        mujoco.mj_step(model, data)
        viewer.sync()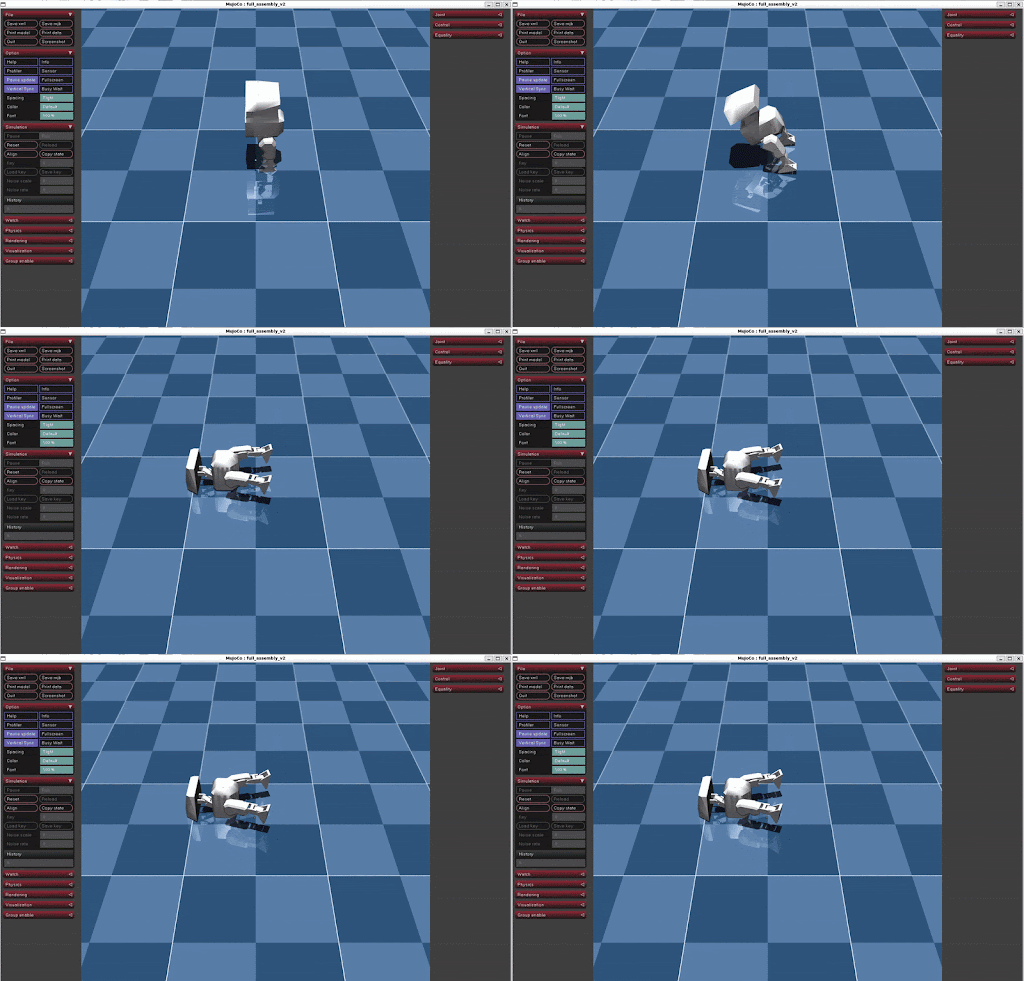
Optional xml modifications
To make floor blue
Add to very top right after
<mujoco>
<asset>
    <texture name=”tex-checker” type=”2d” builtin=”checker” width=”512” height=”512” rgb1=”0.1216 0.2431 0.3569” rgb2=”0.2431 0.3569 0.4824” mark=”edge” markrgb=”0.80 0.80 0.80”/>
    <material name=”mat-checker” texture=”tex-checker” texrepeat=”30 30” reflectance=”0.2”/>
</asset>
Add these right after
<worldbody>
<light name=”bright_sun” directional=”true” diffuse=”1 1 1” specular=”0.5 0.5 0.5” pos=”0 0 5” dir=”0 0 -1”/>
<light name=”fill_light” directional=”false” diffuse=”0.5 0.5 0.5” pos=”3 3 2”/>
<geom name=”ground” type=”plane” pos=”0 0 -0.02” size=”10 10 0.1” material=”mat-checker” contype=”1” conaffinity=”1” quat=”1 0 0 0”/>
Walk
It makes sense to first get the walk working using controls. It can then be tuned further using RL. The Placo library is used to get the initial walk.
Idea
Input characteristics of walk to generate
Use kinematics solver to map each position and timestep (create trajectory)
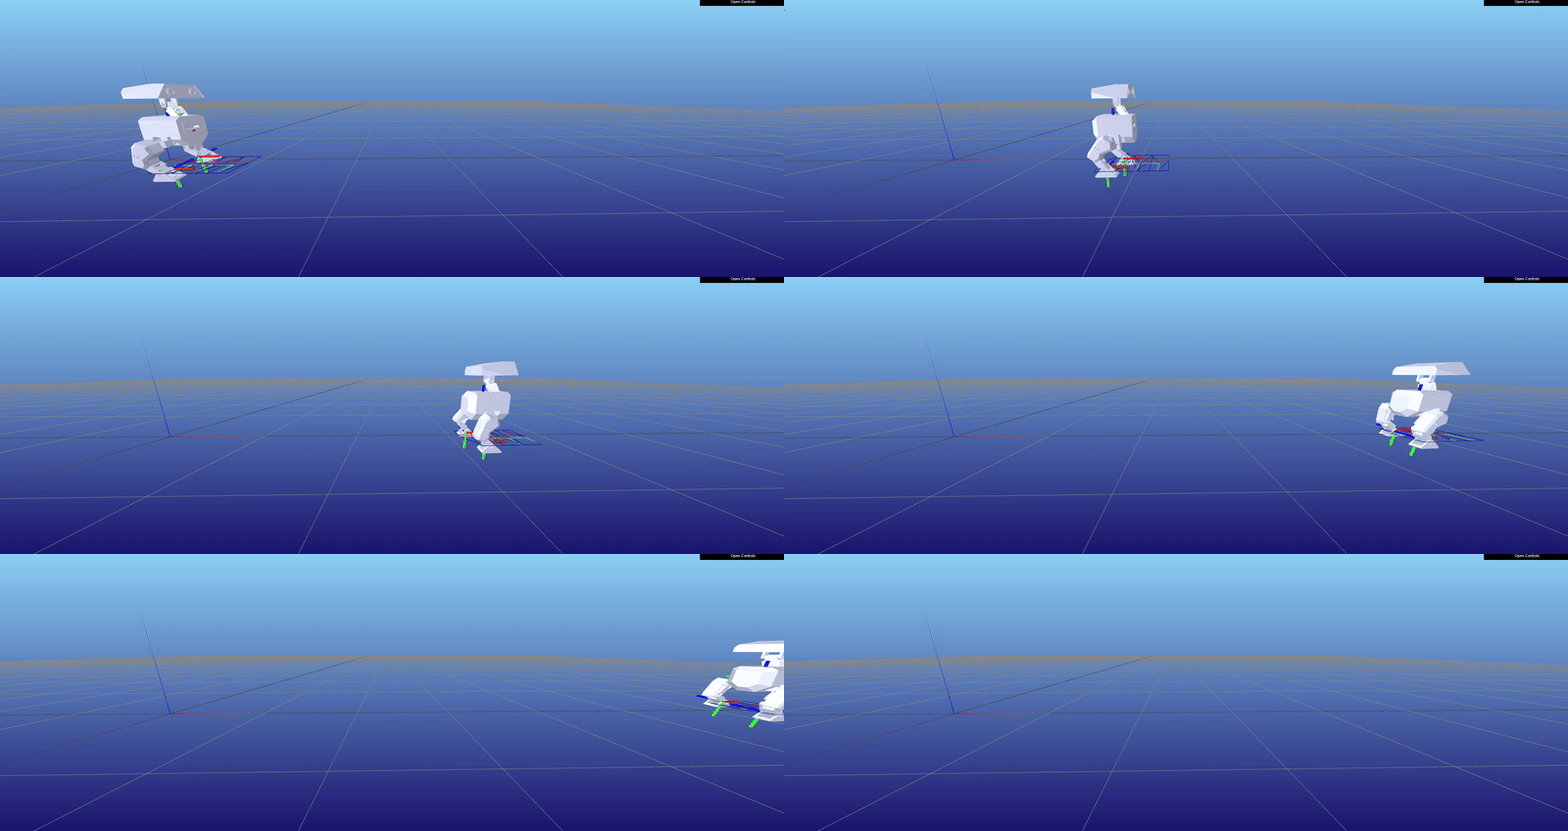
Placo acts as a generator, generates the joint angles for each joint for each timestep, which repeats
Then can simulate this walk by applying those joint angles.
This was based on Open Duck’s motion generator, by Antoine Pirrone. The goat. I took only what I needed and made some adjustments to generate a motion profile the way I needed it. I originally wanted to copy the whole pipeline for my robot (including the RL) but there was a lot of unforseen difficulty with the RL side. This is my forked repo with the adjustments.
Raspberry Pi
I used a raspberry pi zero 2W for this project. It’s relatively cheap, small/light, and has good compute power for its size. To start programming the motors, I made small dummy scripts to read the motors positions and write motor positions.
The setup on the RPi is fairly simple. The libraries initially needed are git, python3-pip, and python3-virtualenvwrapper. These are installed using:
sudo apt update
sudo apt upgrade
sudo apt install git
sudo apt install python3-pip
sudo apt install python3-virtualenvwrapper
On the RPi, I created a folder called sw and cloned this repo in it with submodules. I created a venv
python3 -m venv .venv
source .venv/bin/activate
pip install python-st3215
By default user does not have perms to access the usb port.
sudo usermod -a -G dialout $USERExit and re-enter terminal
The scripts in the repo can read, and write positions. I used them to test all motors were working.
The playback script can also read from json files generated using placo and run them on the real robot.